Making a custom print page in Articulate Storyline is a great way to show results for your users. By results I mean tracking user data and printing off user's answers to questions for later review. That means you can create a FAQ, a quiz, user notes, or any kind of user input interaction to be printed. This gives the user a unique handout from your course that they created for themselves. This post will show you six steps on how to make your printable results page awesome.
Step 1: Download the Zip File
Download the zipped file PrintPageBlog.zip .
Within your zipped file we will mainly use the following files:
- story.story file
- The Publish folder
- HTML file print.html*
- image logo.png*
*Found inside the Publish folder.
Step 2: Incorporate Your Own Variables in Your .story File
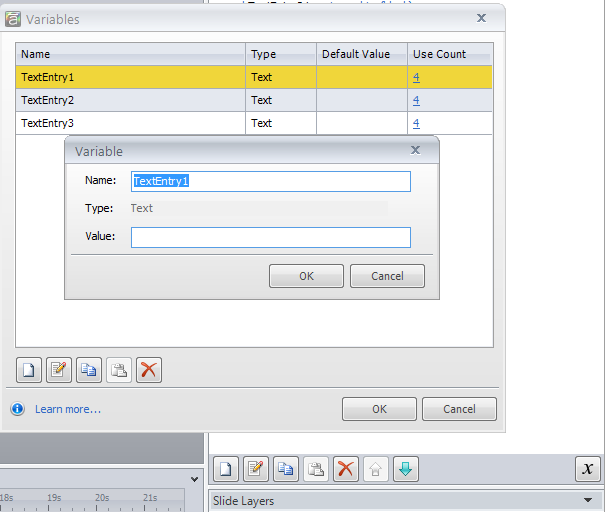
Create your variables for the text entry boxes. I named these variables: TextEntry1, TextEntry2, and TextEntry3. Make sure to make your variable type as "text."
Step 3: Make Three Layers
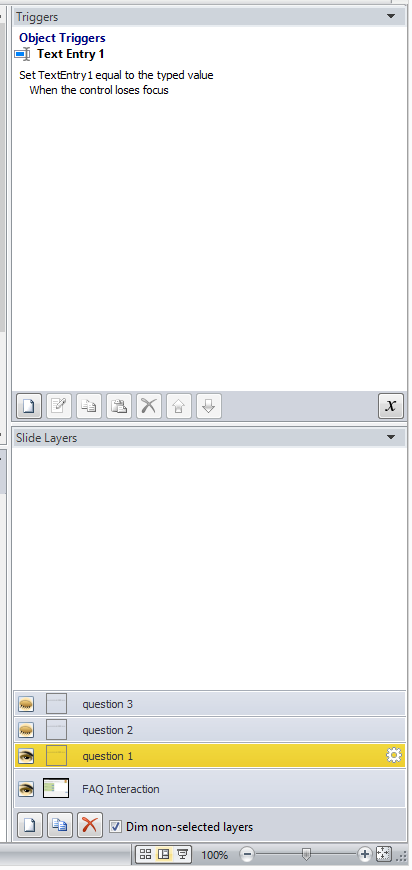
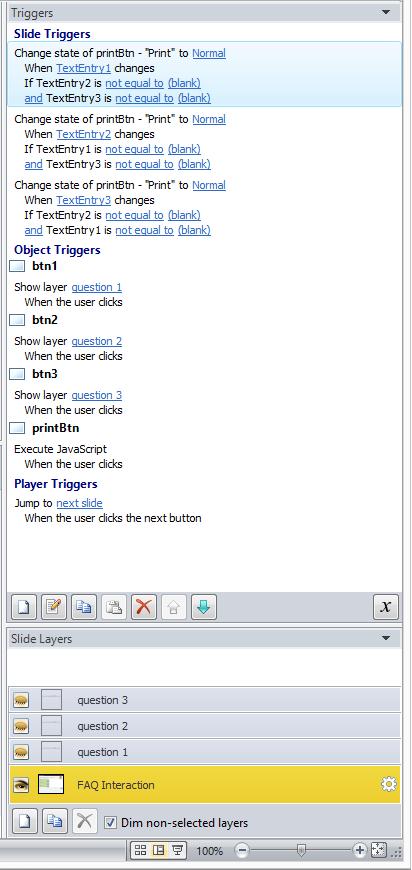
Make three separate layers for each question and place a trigger setting for the variables TextEntry1, TextEntry2, or TextEntry3 to the typed values.
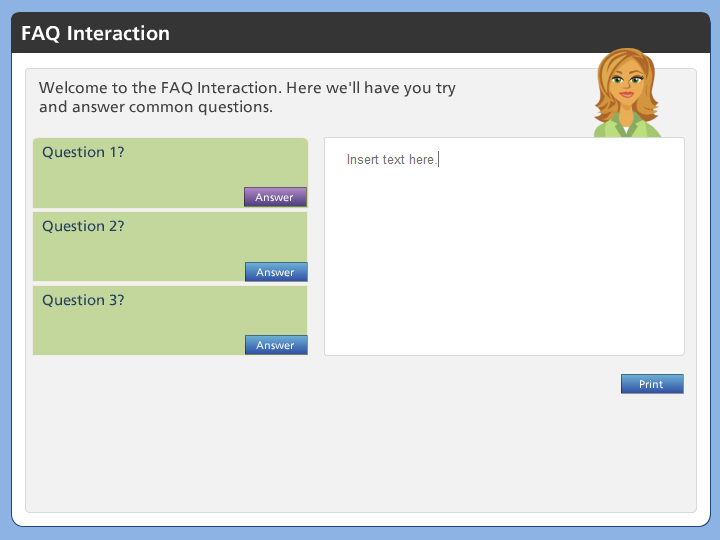
Notice I've inserted a print button so only after the learner is finished typing it will be active. To clarify how this print button becomes active, it needs three triggers in the "base layer." These three triggers need to check whether the questions have been answered.
When the user puts text in TextEntry1, TextEntry2, or TextEntry3 these triggers will automatically check whether the other two entries have text or not. Once they are all full of text, the print button will become active for the user.
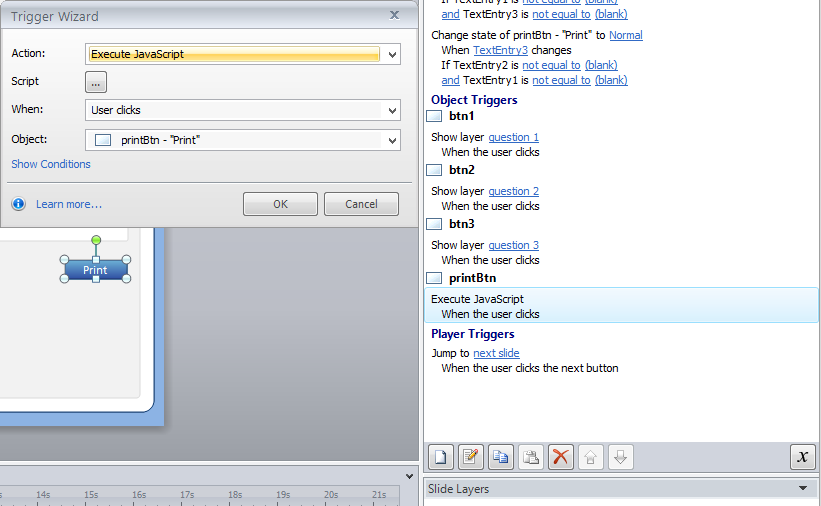
Step 4: Activate Print Button to Execute JavaScript
Once the print button is active it needs to have an “Execute JavaScript” trigger attached to it, such as the example below:
Step 5: Open JavaScript and Add Your Questions in Storyline
Open your JavaScript in Storyline and change questions to match your content. Inside JavaScript will be as follows:
var player = GetPlayer();
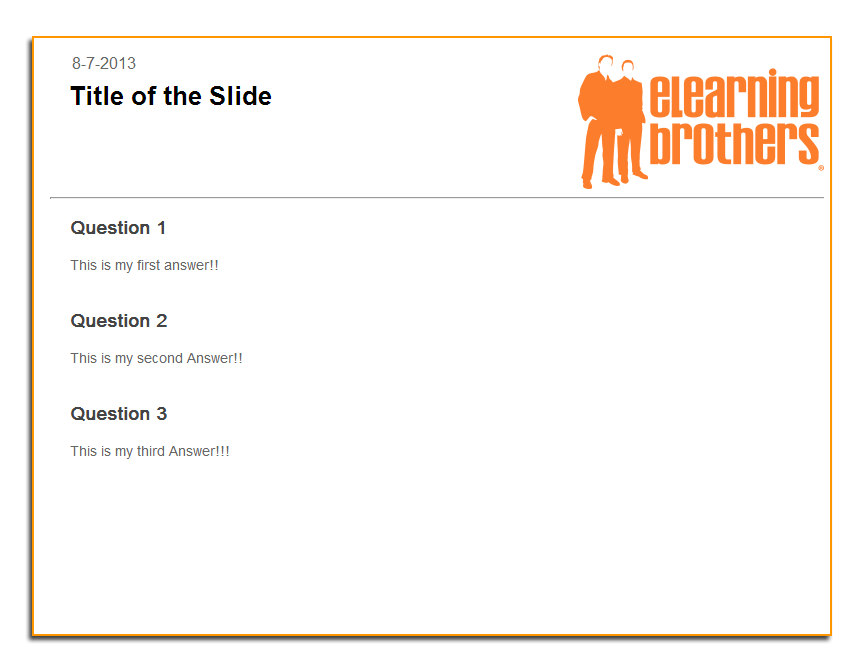
var header = "Title of the Slide~~"
var args =(
"Question 1~~" +
player.GetVar("TextEntry1") +
"~~Question 2~~" +
player.GetVar("TextEntry2") +
"~~Question 3~~" +
player.GetVar("TextEntry3")
)
var url = ("print.html?=" + header + args);
window.open(url,”_blank”,”width=800,height=600,menubar=no,scrollbars=yes”);
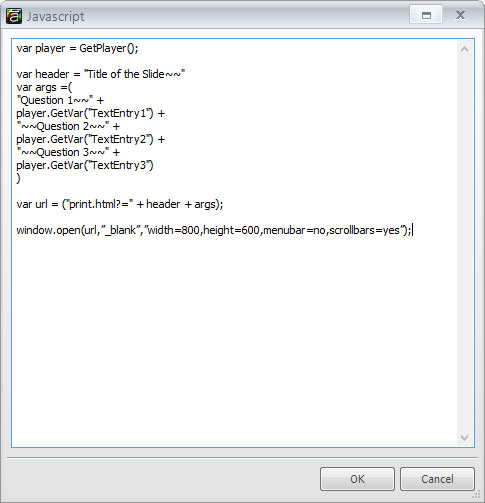
As you can see, I used Question 1, Question 2, and Question 3 as place holders for you to put in your own questions. Also Title of the Slide is a placeholder that can be changed with your own information.
Do not replace or remove the ~~ symbols, though. These are important markers for the HTML document later.
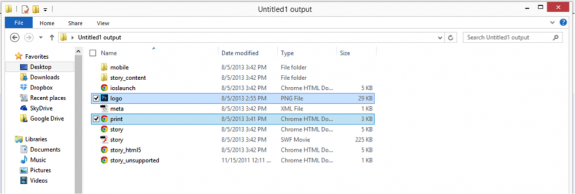
Step 6: Add Two Files to Your Published Folder
In your published folder you will need to add two files.
- HTML document (needs to be named print.html)
- A logo (needs to be named logo.png)
For now just know that the print.html document works and it is found in the publish folder I provided.
Once you have a logo name it logo.png.
Now that you have your logo.png and your print.html files, drag and drop them into the "root folder" of your published file version. The files should be organized in your published file version like this:
After you have published out your story and placed the two files in that root folder test it out yourself. Now a user can print out the questions and answers in a print friendly document.