Have you ever wanted to get object-level analytics from a Storyline 360 interaction?
You can with our templates.
We've recently updated our Storyline eLearning template xAPI method to work with 360's modern player so you can see all the learner behavior you're looking for with no scripting needed, and without a ton of picking through the file or adding additional code to your final course.
Here's a quick rundown of how xAPI now works in our Storyline templates:
By default, Storyline provides a pretty standard set of statements out of the box: information about course attempts, slide visits, quiz performance, and completion.
But it doesn't provide for a clean and easy way to generate custom statements about the objects and content *inside* a course, or how they're being used.
Using our approach to xAPI in SL360, you can get information about every button a user clicked or decision they made in an interaction.
Want to know how many times a user reviewed layer 4 in your interaction? No problem.
How about the most frequently consumed content in that interaction? Easy peasy.
The best part?
It's super simple with these eLearning templates.
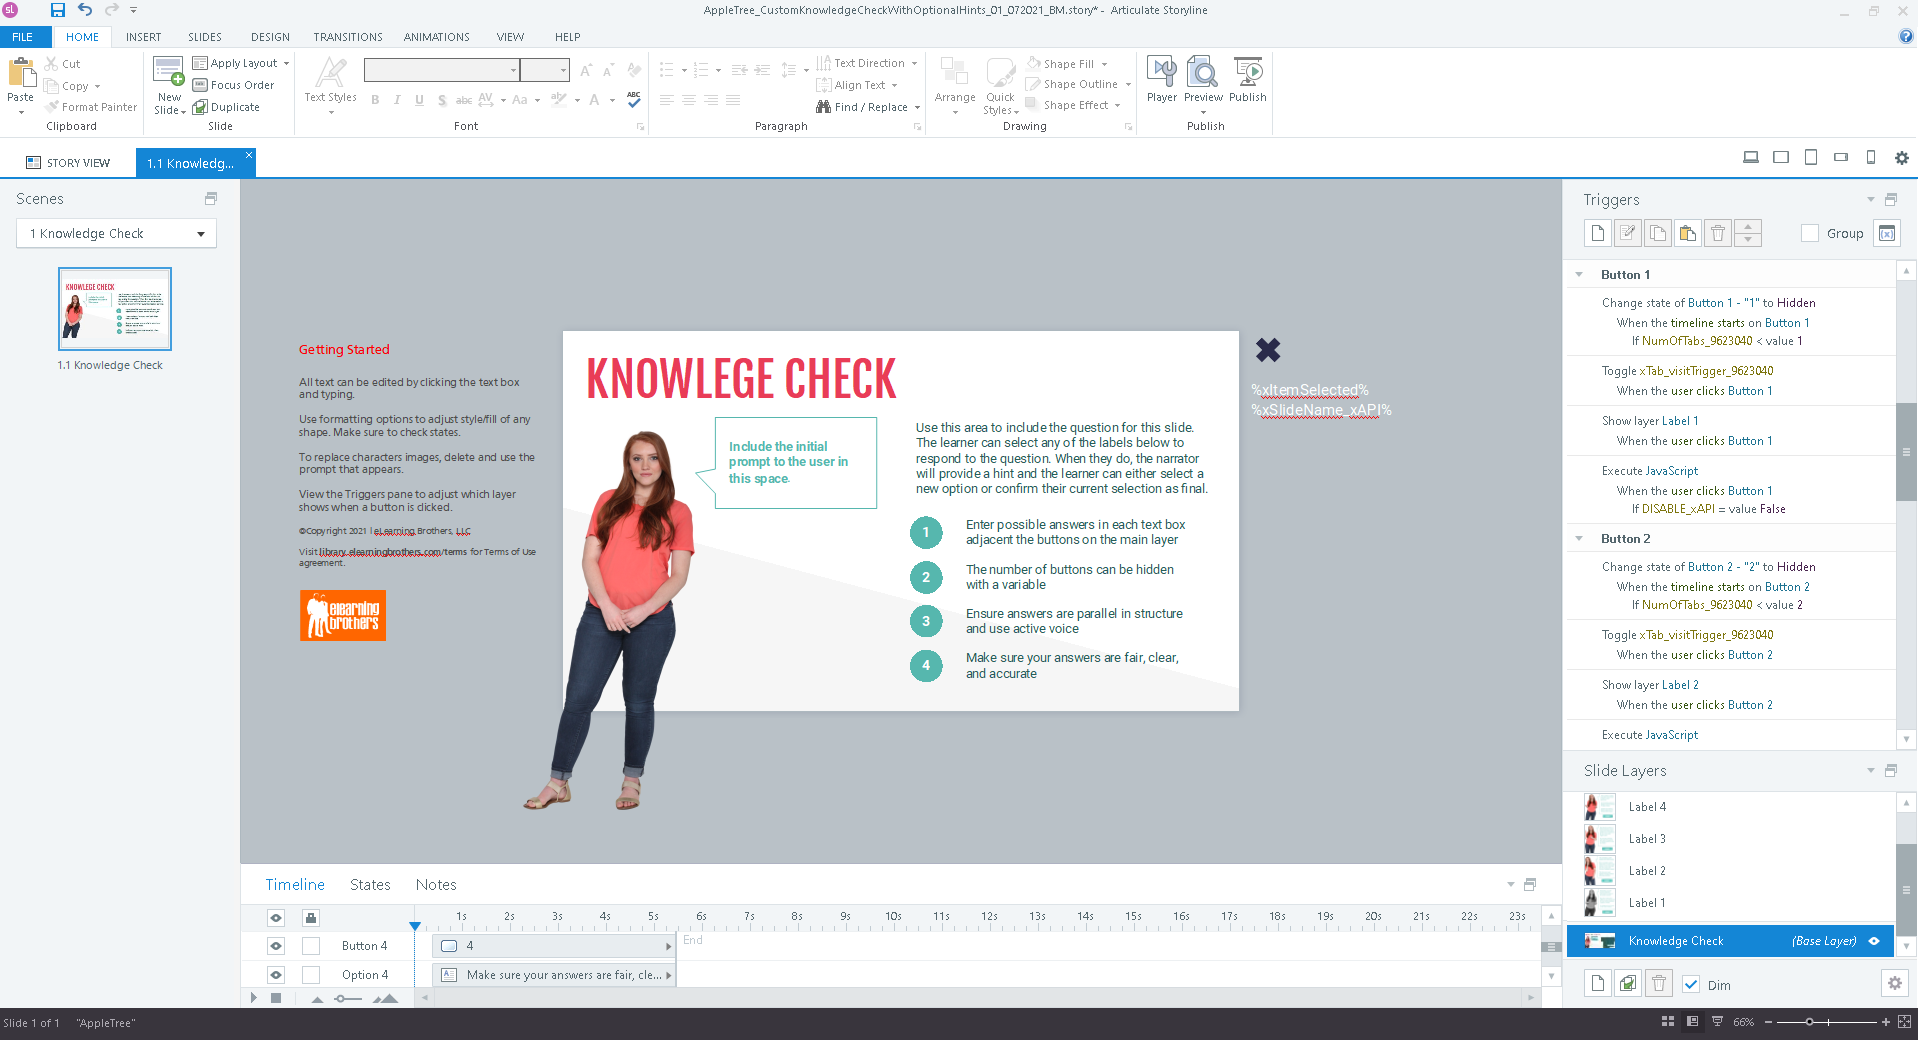
When you first open one of our Storyline 360 interaction templates, you'll see an X shape at the top right of the screen.
We use this shape to initialize xAPI and do some background stuff. You can mostly ignore this unless you want to customize the verb that is used in your interaction.
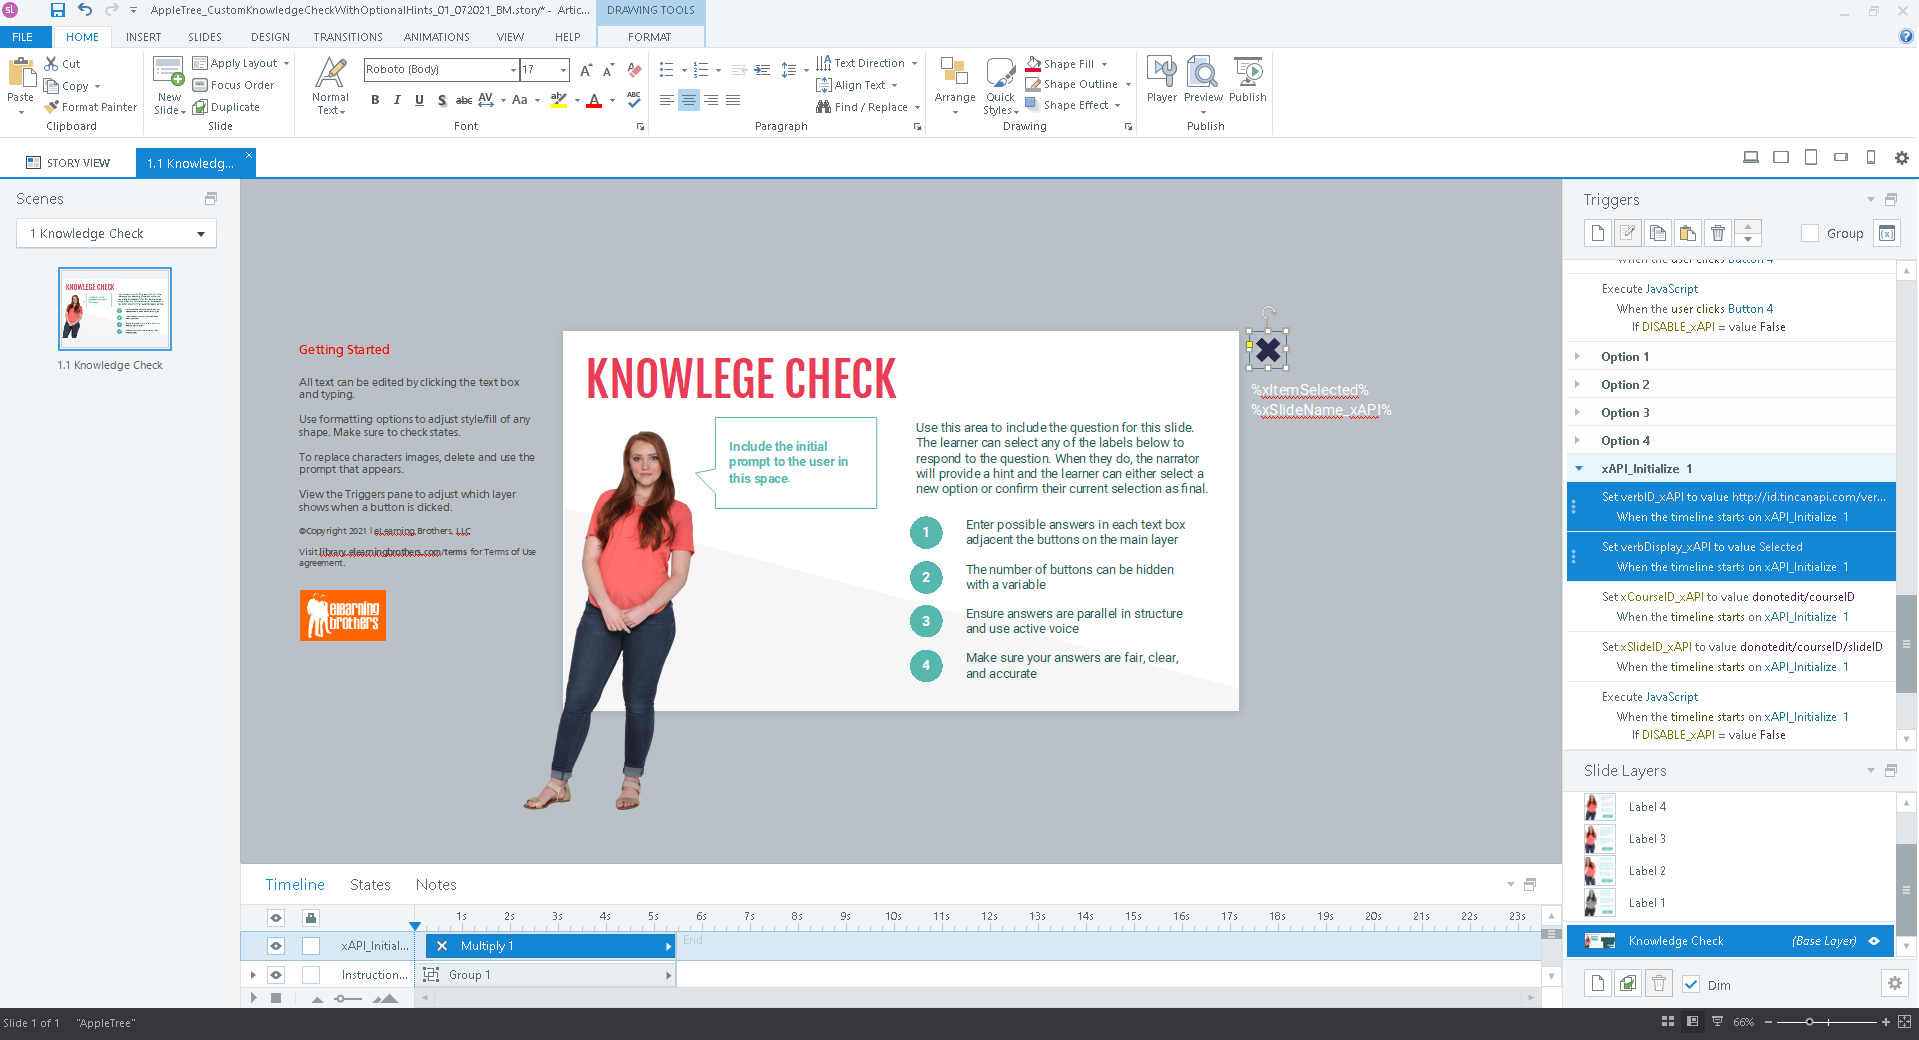
If so, just select the verb ID and display variable triggers shown here, make your edits, and you're good to go.
If you're fine with what we've included for you, you can totally disregard this. This shape is very important though, so make sure you don't delete it.
The only other thing you might need to change in the interaction is the labeling for how your objects display in the LRS.
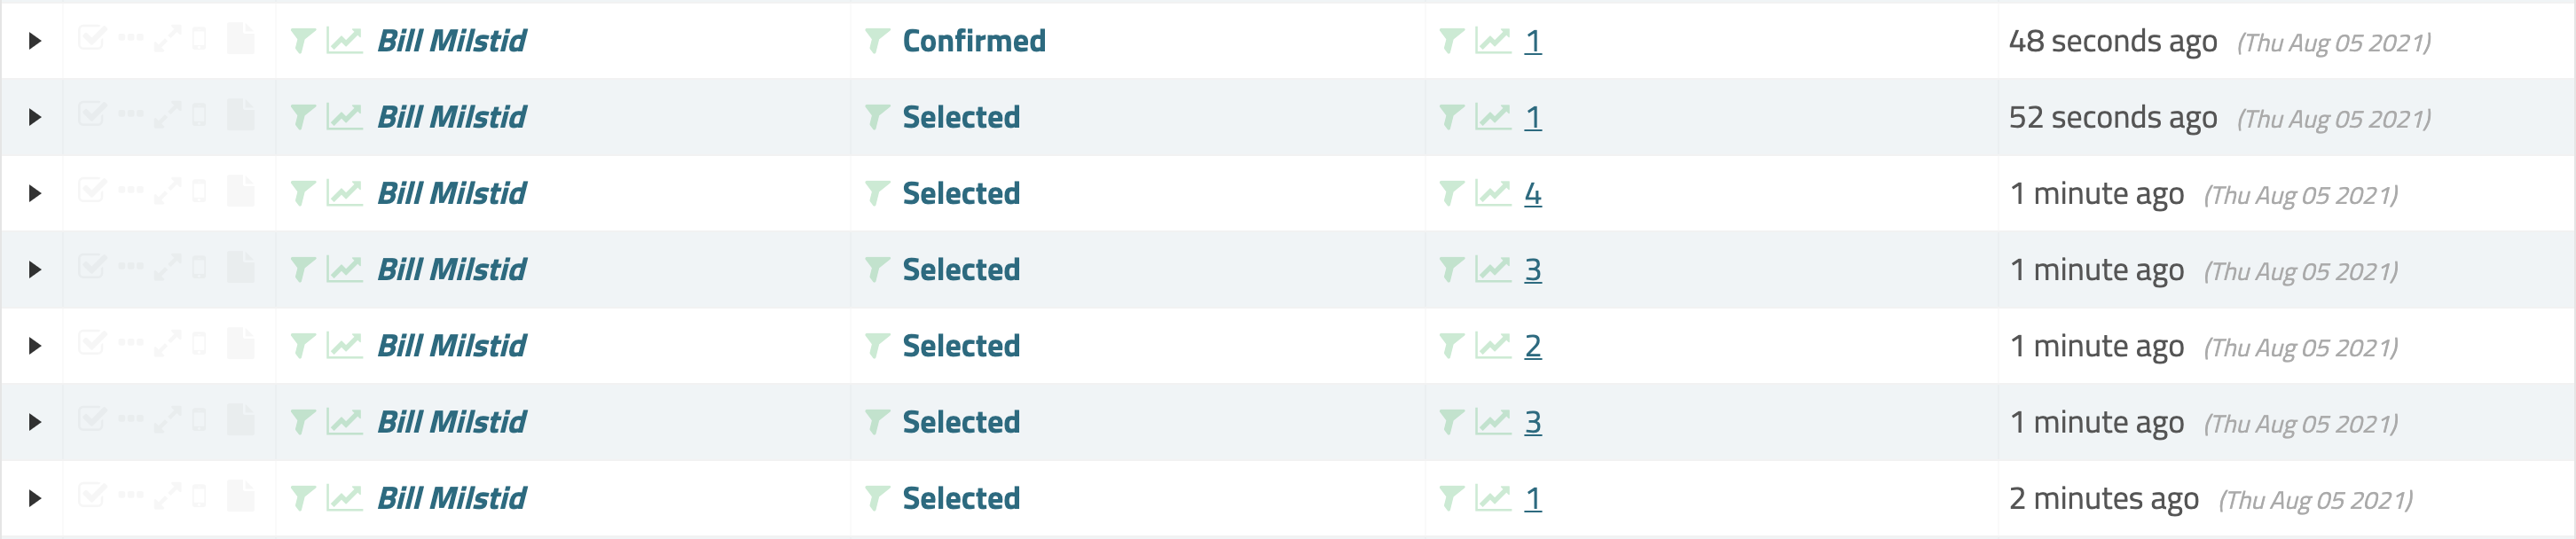
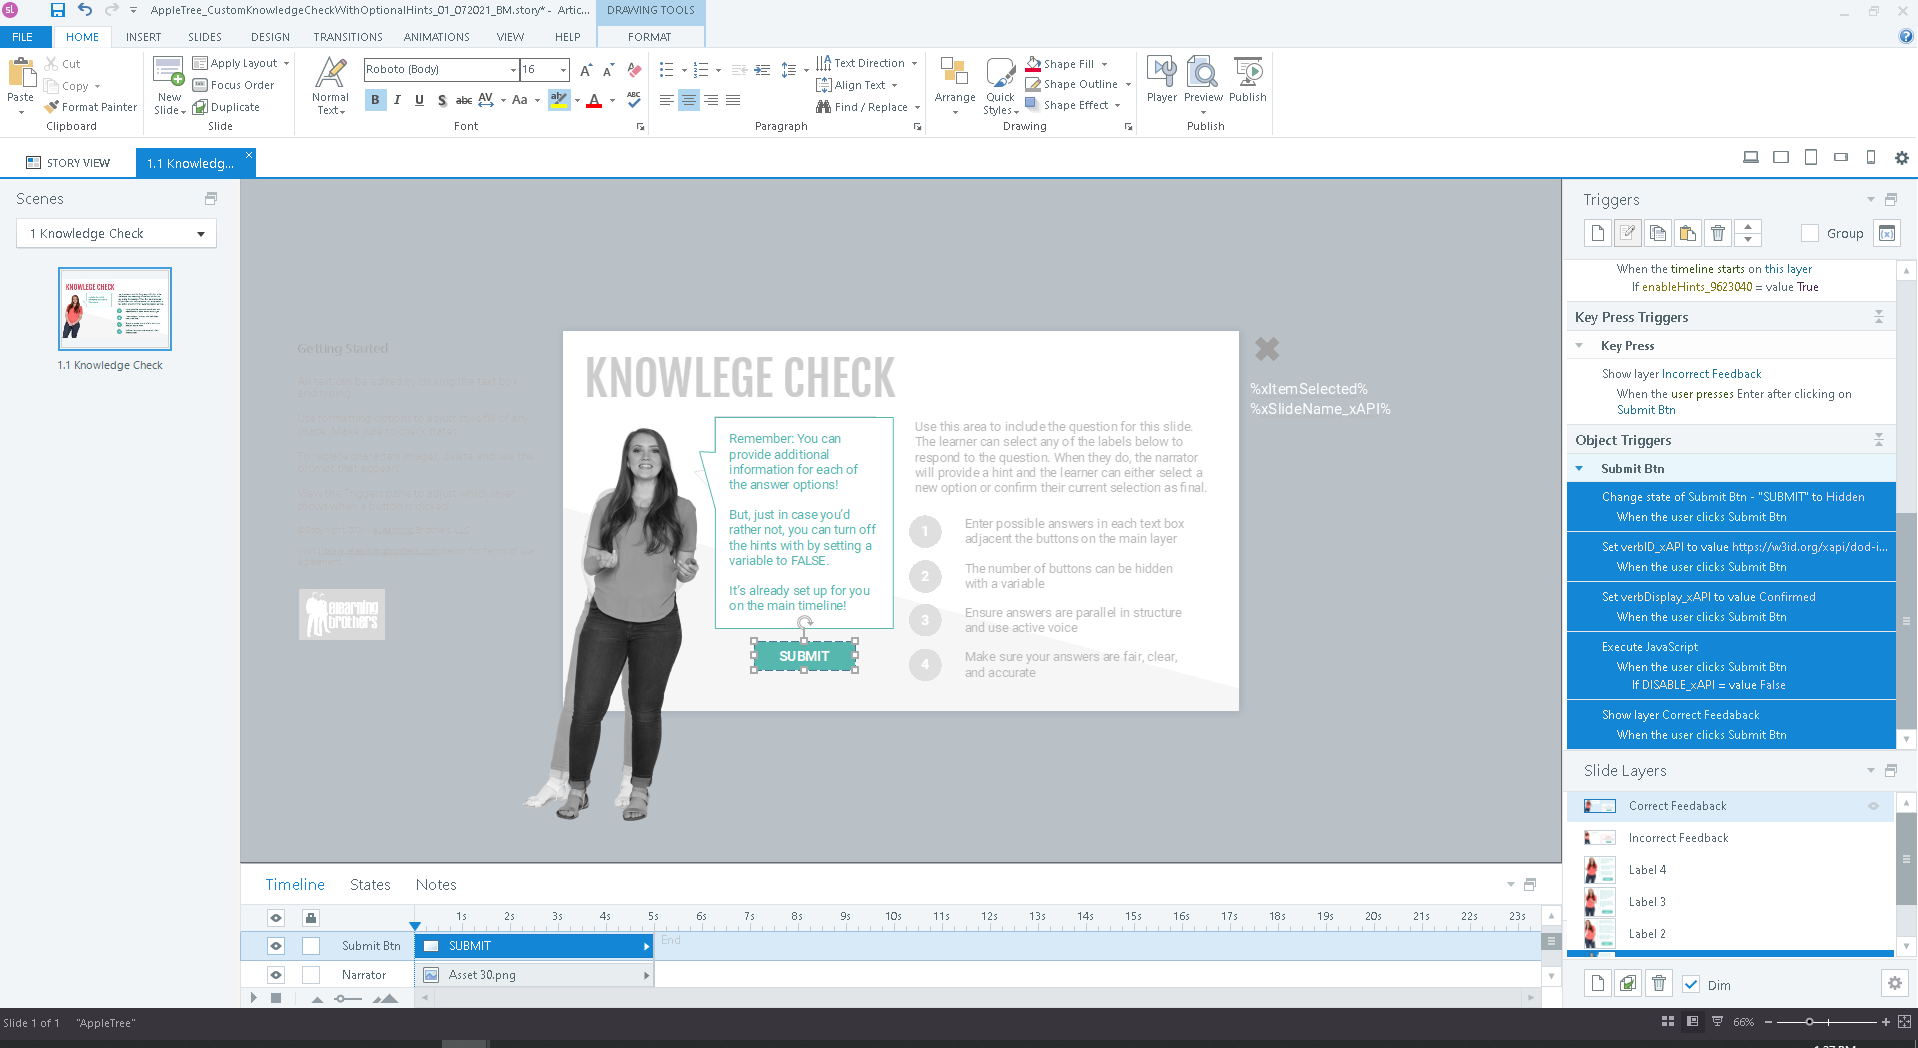
In this particular example, each time a user presses a button, we send a statement.
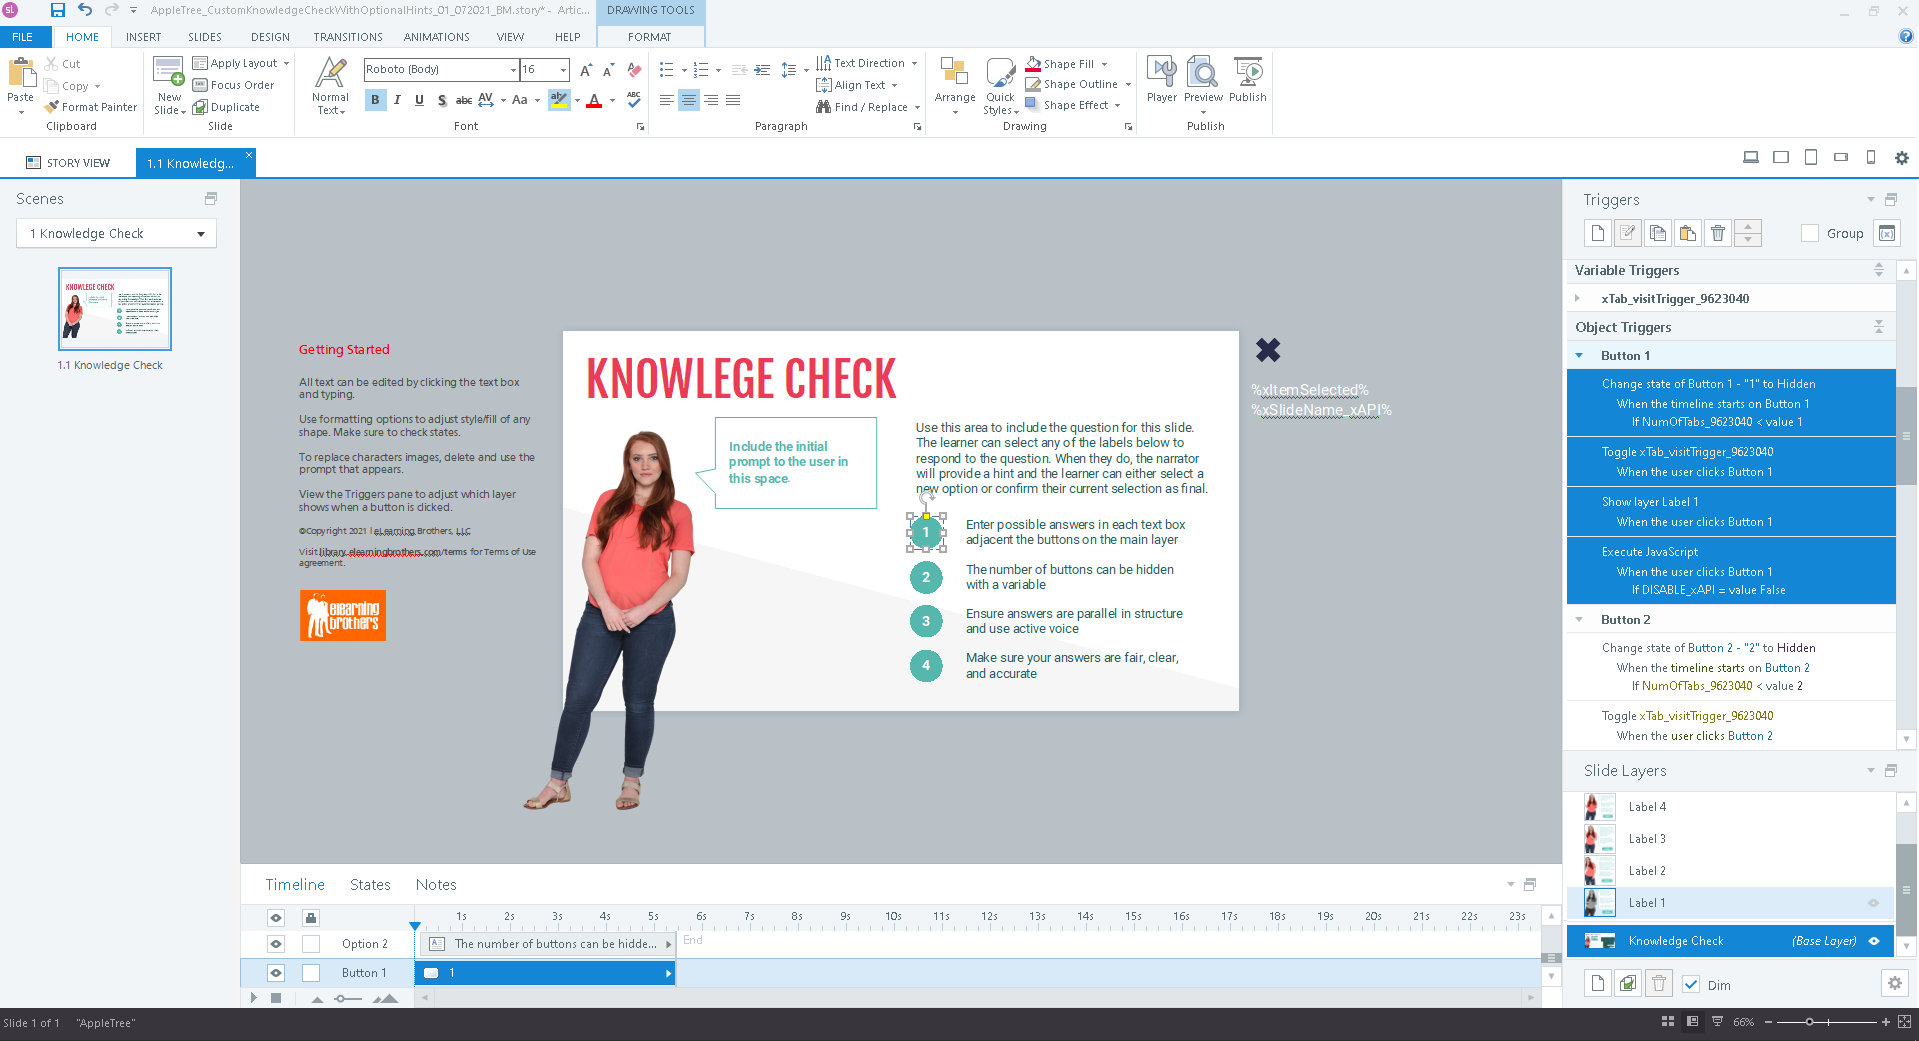
All the stuff that powers those statements is handled for you in the Javascript trigger that fires at the bottom of each button's action stack. You don't need to touch any of it.
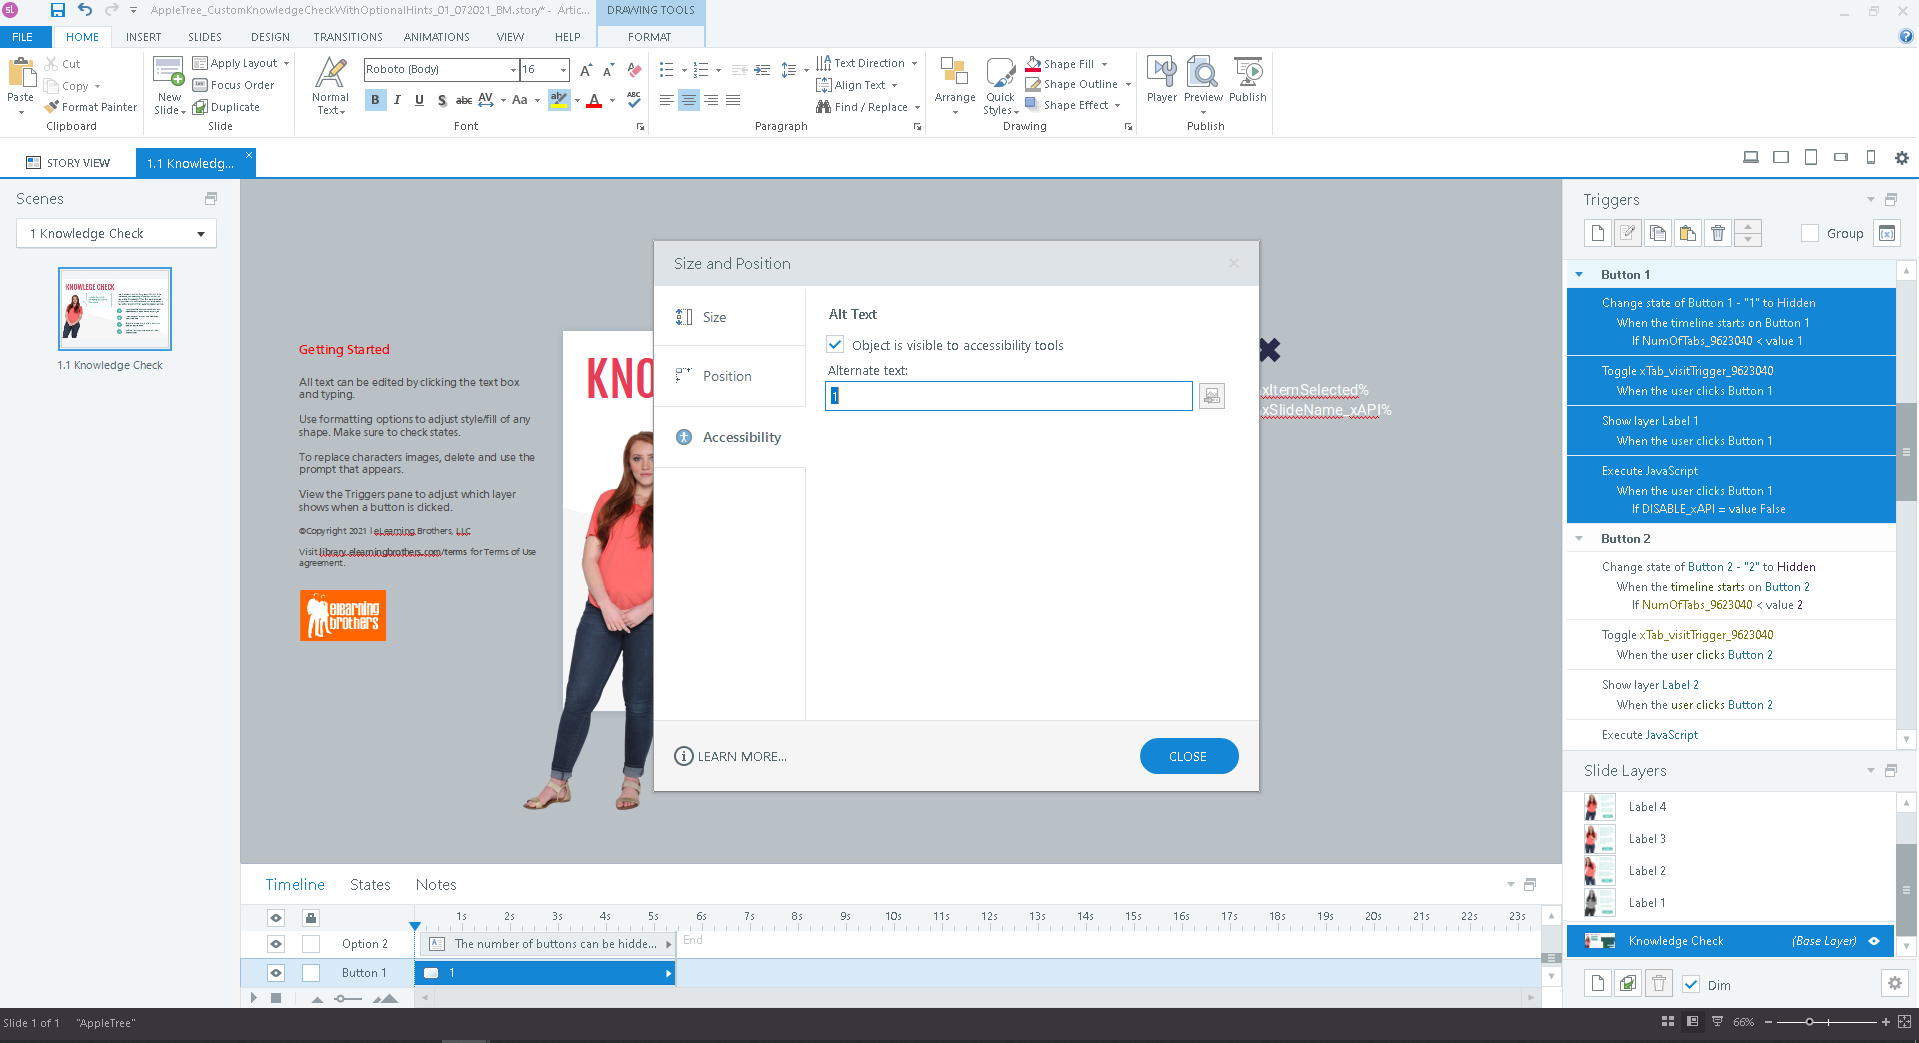
Instead, use the accessibility tags to change the LRS object name.
This example, out of the box, uses numbers to identify buttons. You can change this to whatever you want under the alternate text field.
This particular interaction includes additional statements, beyond just whether or not a learner clicked a button and launched content. It also sends statements when a learner makes a selection, and whether they passed/failed the interaction (this does not affect the overall course completion).
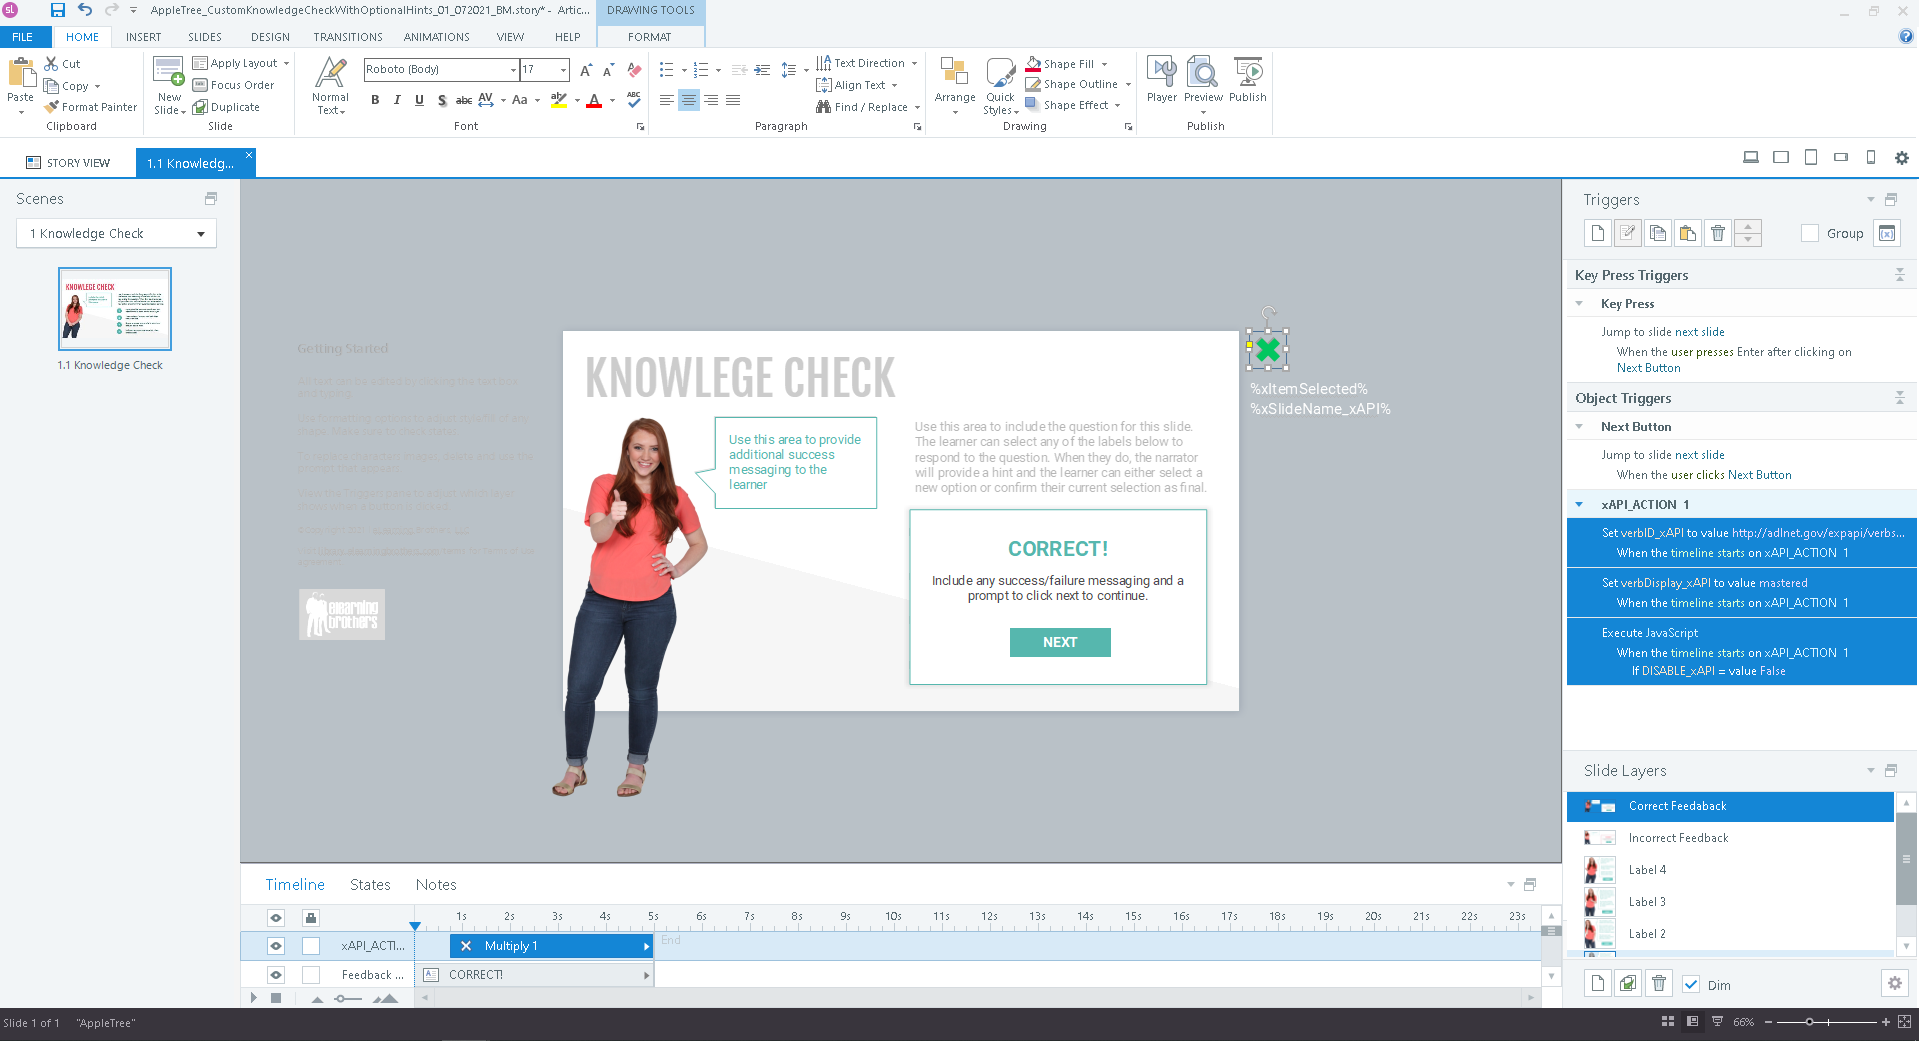

We've got a wide assortment of interactions in the library that provide this level of granular, additional detail. Edit the additional statement objects on interactions like these the same way as the previous example: adjust the verb ID/display if you want, and then use alt tags to address naming. Easy peasy.
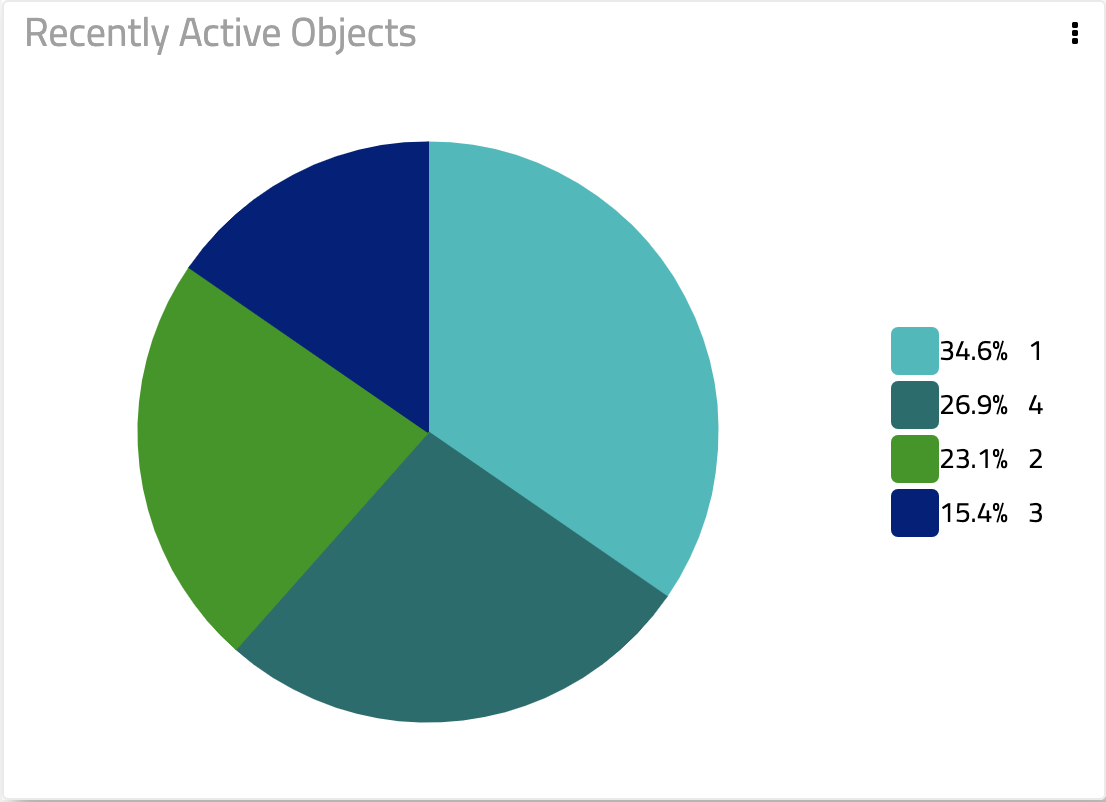
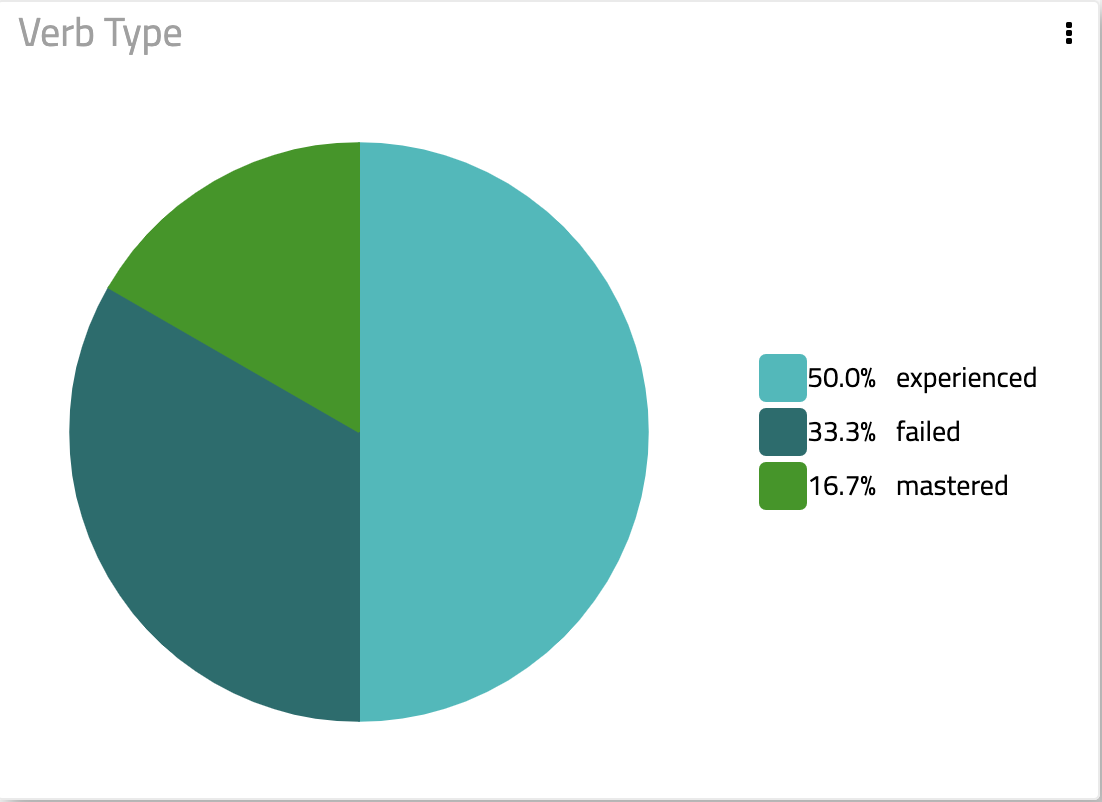
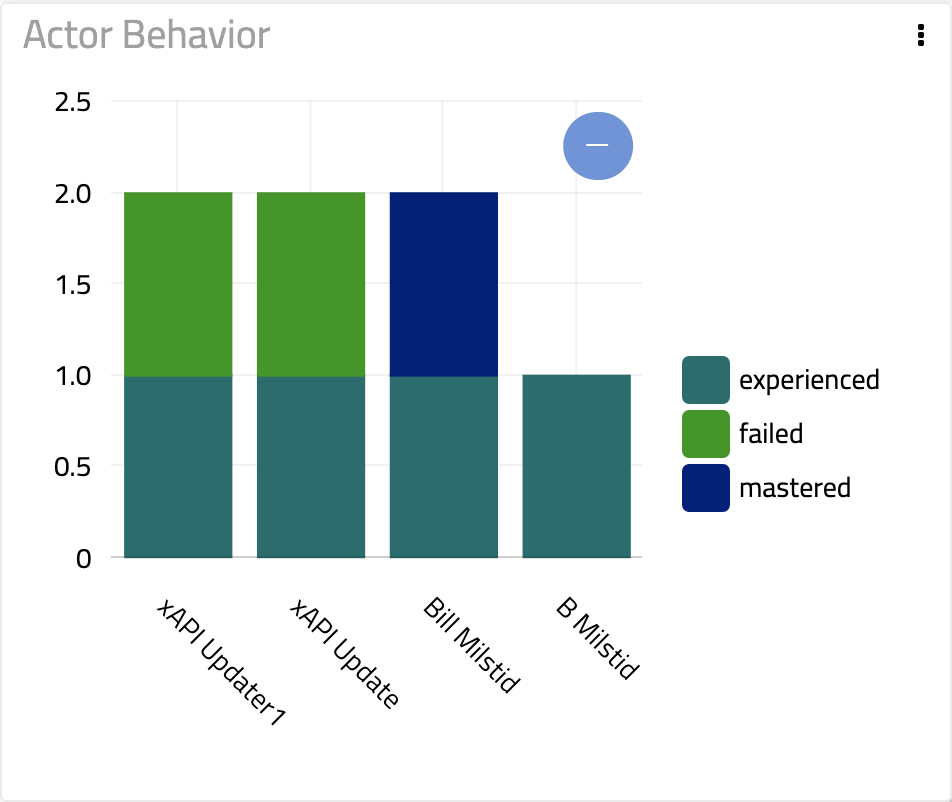
You can get a whole lot of information out of a template like this without doing anything further. If your LRS has a good analytics package, you can generate some pretty detailed charts to get a deeper understanding of what's going on in your interaction and the entire course overall.
We'll detail this to a much greater degree in posts going forward. We're working on a series to detail how to accomplish some pretty impressive tasks using xAPI—but here's a quick sneak peek.
Log into your Asset Library account now to try this out, or sign up for a free trial.